Let it Snow Print

Have you been decorating for the holidays? Waiting for snow? Picking out the perfect gifts for friends and family?

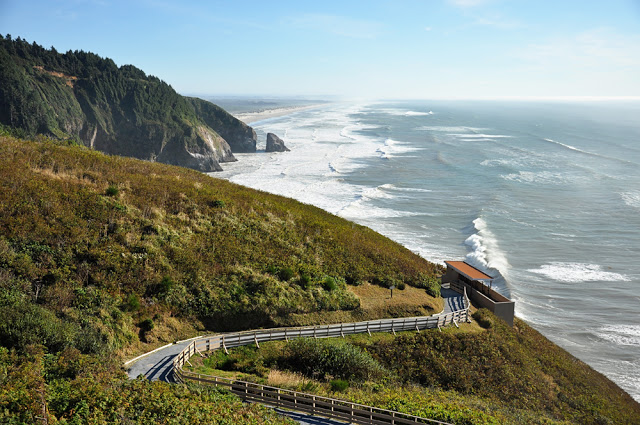
I've been eagerly awaiting the arrival of snow on Mt Hood (since the weather has been dark and rainy a la late-October, there's no sense in wishing for nice hiking weather, so now I'm officially wishing for stormy, snowy skiing weather) but the latest forecast has been sleety, freezing rain more than the white puffy stuff. We had some great early-season weather last year with good groomers to run and blue sky days, so here's hoping this year is just as great.

In an effort to make our apartment look more festive (and to make the snow gods smile down upon us) I whipped up a fun two-part Let it Snow print to decorate the walls!

{let it snow print}

And since it's the holidays, I want to share it with you!

This print is formatted for an 8x11 sheet of paper, so just open the photo below, save to your computer and print with the setting "scale to fit: print entire image." Then you can cut both prints down to 5x7's. (Cutting 7" down from the top and 5" in from the edges on either side will trim the print pretty close to the edge. If you want a border, you'll have to adjust your measuring.)

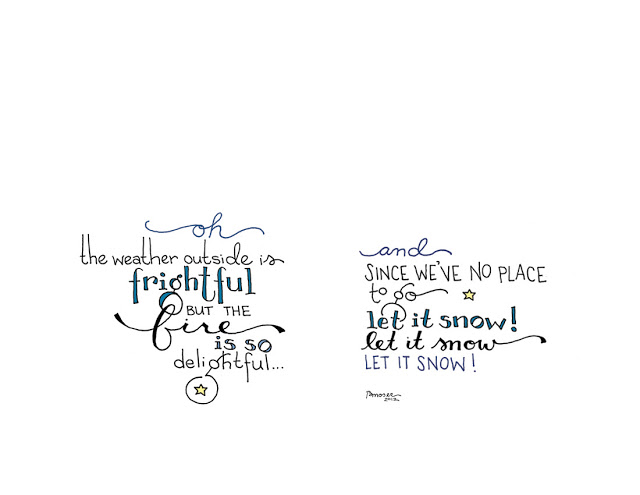
The image will print ever so slightly hazy, in a dreamy, awesome kind of way, of course. (I couldn't put a higher res image on here because it kept crashing my uploader...) Don't worry; it still looks lovely in a frame. :)

All I ask is to please print these for personal use only, and if you use it on your website, please link back to my blog. Thanks! :)

And since I was in a crafty mood (and in a drawing frame-of-mind...) I made some new holiday cards for the shop.

Here are the latest additions (click to see the listings):

This last one came to me as I was falling asleep the other night. I literally sat up in bed and started hollering for Tanner, who came running in from the living room thinking something was on fire.

I started yelling, "I've got it! Santa will have a big mustache and the card will say: here's some cash for your Christmas stash! Get it??"

Well, I thought it was hilarious.

DIY: Origami Ornaments

Today's Christmas craft is an ornament for people who love origami, but who suck at origami. (Like me.) This is the probably the easiest little paper folding craft ever. It literally takes five minutes to put together, but it looks so cool that you could tell long-winded stories about how awesome you are for figuring out how to create this little puzzle.

I chose to make my ornament out of scrap wrapping paper, in the spirit of the season. You can use any kind of paper you like. Heavier papers stay folded together better, whereas wrapping paper "slides" around a little more. If you're worried about the ornament falling apart you can add a little glue or tape to keep it together. (But that's like an origami faux pas, right?)

{origami ornament}

Supplies:

Scraps of wrapping paper, origami paper, or any kind of patterned, decorative paper
Needle
Embroidery thread
Glue or tape (optional)

First you'll need to cut some scraps of paper into rectangles, with the width half the size of the length. I chose to make my paper scraps 2" x 4" big.

Fold your first piece of paper in half length-wise.

Fold it in half again, this time width-wise.

Unfold that last step and turn your paper so that the folded edge is facing down and the open edge is facing up.

Now create little triangles on either end by folding the edges down at 45 degree angles to run parallel with the bottom fold of the paper.

Fold your paper back in half, triangles still folded in.

Do this same series of folds to eight more pieces of 2"x4" paper scraps.

To put them together, start with one of your folded pieces, the open edge facing up and the folded edge facing down. Take a second folded piece of paper and carefully fit the triangle edges into the little "pockets" created at the top of your first piece of paper.

Take a third piece and carefully tuck it into the pockets of your second piece.

And so on...

When you get to your last piece, tuck the piece of paper you started with into its pockets so that the pieces form a complete circle.

Adjust the size, tighten the gaps, and use a little glue if you need to. (I won't tell.)

Use a needle and embroidery thread to put a hole through one of the tips to hang the ornament.

Hang and enjoy!

I don't have a Christmas tree set up in our house, yet, so here's my ornament on our fake tree: Fetching, right? :)

DIY: Tabletop Christmas Tree

It's the holiday season again, and time to get crafty! Today's craft, to kick off the season, is a Christmas tree table decoration:

{tabletop christmas tree}

Supplies needed

Three small ceramic plant pots of descending sizes (I used one 4 1/2" diameter, one 3 1/2", and one 2 3/4") 
Decorative candlestick
White acrylic paint and paintbrush
Decorative embellishments (such as twine, stars, glitter, etc)

This is a very easy craft to put together, and the best part is that you can change subtle details about each tree to make a whole forest of unique decorations!

Gather your supplies from craft stores or a thrift shop. I visited Goodwill for this project and managed to get 6 different ceramic pots for $0.50 each, and a couple of unique candlesticks for $1.00 each. It should be pretty easy to find these basic second-hand supplies at your local thrift store. Can't beat it!

First begin by placing down some newspaper on your work surface to protect it from paint. Paint your pots with the white acrylic (or any other color you choose).

 I painted several coats (drying in between) before the paint covered the ceramic well enough. I did the rims of the pots last so I wasn't constantly putting my thumbs in wet paint.

This project works well with three pots stacked together, but I happened to find something unique in my trip to the thrift store: a small metal pot with stars punched in the sides. Since it was exactly the same size as my middle-sized pot, I decided to use it, instead.

Once your pots are painted, you can either decorate them with some glue and glitter, or leave them as-is for a more minimal approach. Stack your pots carefully upside-down on top of your chosen candlestick and decorate to your heart's content.

I considered putting ornaments or a star on top of my tree, but ultimately decided that I liked the stark white-and-silver look without embellishments.

A quick note: you can glue your stacked pots together if you like, but I didn't. They stay together quite well on their own, and this makes the tree easy to disassemble after the holidays.

Have fun! I'd love to see the unique iterations you come up with!

A Trip Up the Oregon Coast

I hope everyone had a delightful Thanksgiving! Though we were skiing at this time last year, we had an Indian Summer this year and the snow hasn't quite blanketed the mountain, yet. (I'm holding out hope that it will be soon!)

If you're doing the holiday shopping spree that is Black Friday today, check out Darkroom and Dearly for a special holiday sale! Buy 4 cards, get 4 free! This offer is good on any quantity over four, and will run all weekend through Cyber Monday. Mix and match any kind of card, or build yourself a custom Christmas card set! The possibilities are (almost) endless! :)

In the meantime, here's the conclusion to the epic road trip my family took, first to Crater Lake, then to the Redwood Forest, and now working our way back to Portland...

We were quickly falling into a steady rhythm this trip, despite our lack of planning for the latter half of it: we found ourselves waking early, doing one last touristy-hiking-scenic lookout before driving onward for 4-5 hours, searching for a campsite at a local state park by evening, pitching the tent and enjoying one of our many packaged dehydrated meals for the night. Then we woke up and did it all over again.

Once we left the Redwoods, we decided to drive highway 101 up the Oregon coast back to Portland, since it seemed the more interesting route to take. Having never done this drive before, we had absolutely no idea what there was to see, what tourist attractions there were, what state parks we might be able to camp at, or even a map or guidebook to tell us all these things. All we had was Tanner's iPhone, which (more often than not) didn't have service, anyway. I lamented the fact that I had at least five sets of maps, pamphlets, and hiking guide books specifically tailored for the Oregon coast, and all of them were at home. (Blast!)

So we resorted to my mom's memory of the last time she had visited here (...in 1991), and the random road signs we came across along the way. It was completely unplanned, uncoordinated, fly-by-the-seat-of-your-pants traveling. For someone as OCD as me, it totally stressed me out. I worried that we were going to miss something cool that we didn't know about, or that we weren't going to be able to find a campsite for the night, or that we wouldn't make it up the coast in time. But somehow, it all seemed to work out.

As we drove, we wrote down all the things that we had heard of - or imagined that we heard of - from coworkers, friends and memories of what there was to see on the Oregon coast. Then we looked them up on our GPS and plotted a point-by-point route up the coast. We estimated where we needed to stop and called friends to get their recommendations for best camping spots. In between, we kept our eyes out for signs that said "scenic view" or "beach" or "attraction." Often our drives were peppered with me yelling at Tanner: "Scenic overlook! TURN HERE! TURN HERE!"

Needless to say, there was a lot of jumping in and out of the car and lots of getting lost on backroads.

We wound our way up the coastline, entering Oregon and slipping through the many coastal towns along the way: Brookings, Bandon, Coos Bay, Florence, Yachats, Newport, Lincoln City, Tillamook...

Here's what we saw along the way.

After several side-of-the-highway jumps from the car to take some amazing beach scenic shots (is anyone else picturing The Goonies in his/her head looking at all these magnificent rocks in the Pacific Ocean? Next we'll be finding pirate ships...) we discovered a tourist spot known as the Sea Lion Caves. Apparently you can take an elevator down to a cave where hundreds of sea lions are known to lounge about. I hear it's pretty cool, but at this time of year there weren't any of them in residence, so I took this photo instead. The view was pretty spectacular, regardless.

By early evening we made it up to Cape Perpetua, where we stumbled across a little state park to camp in Yachats. We were hoping to stay in a yurt, but the park ranger laughed at us a little when we requested it and said yurts were generally booked 9+ months in advance. Whoops. So we found a little campsite, instead, and then hurried up to Cape Perpetua to check out the sunset from on high. The views didn't disappoint. As the sun slowly dipped below to curve of the horizon, the fog rolled in and it felt as though we were floating above a sea of clouds. We were so awed by the lovely sight that we stayed until well past dark.

The trees at our campsite were quite lovely. We fell asleep to the sound of the surf crashing against the rocks. The next day we packed up and kept driving north. We stopped to see Devil's Punchbowl and Boiler Bay, offering us some amazing views of the wild ocean.

Seeing a sign for "Cape Lookout" we decided it might be interesting, so we took a slight detour. It ended up taking us on a 30 minute journey to the western-most edge of Oregon, but the beach that awaited us was a beautiful point to add to our travels. 

As our last stop for the day we ended up in Tillamook, Oregon, where most of the cheese, ice cream and milk for the state is produced. We stopped at their famous factory and had lunch and ice cream before cutting east and heading back to Portland.

We ended our week-long trip in high spirits, with two national parks, two states, four state parks, and 1,000 miles of driving under our belts! Great trip!

Here's the epic map of our whole loop: